Git and GitHub for Beginner Developers

If you're a beginner developer looking to gain some new skills, then Git is your next step in becoming a more well-rounded programmer. It's an amazing tool for versioning your code and developing with other programmers, as well as being extremely versatile and having many uses. Git is also relatively easy to pick up, plus it also has advanced features to learn as you grow. Every developer absolutely needs to learn Git and the earlier you begin using it, the better off you will be. It'll also immediately put you ahead of others in an interview process who aren't using it and help you secure that first job.
So what is Git, why use it? Well, Git is a command-line version control tool, it's used to save "commits" (like snapshots) of your code in a development project as well as allow you to collaborate with other developers in an organised and structured way. No longer do you have to worry about overwriting another developer's code on an FTP server and wait hours or even days to retrieve a backup! Trust me, I've been there, and I'll never, ever want to go back.
Git is completely free and entirely open source, so it's the perfect tool to get started with. I personally believe it should be the next step after learning some basics of a programming language, as you need a place to store snapshots of your code and be able to return to a working version if things go wrong, which they almost certainly will.
Installation
You need to install Git first, which can be done differently depending on what operating system you're using. If you're on Mac or Linux, you can easily install it via your package manager. For Macs, this can be done with Homebrew and is the recommended way to install new apps on Macs. Linux has many package managers, and it will depend on your distro.
Git is also available on Windows, along with Git Bash, which can be downloaded here:
https://git-scm.com/downloads
Local Git
Now that you've installed Git and have some code ready, you'll want to start versioning it. Let's start with the basics.
Run the following command in your preferred terminal where your project's root is:
git init

git init command and seeing the init message. Then running ls -a to list all files & directories including hidden items.This will create a hidden .git folder at the root of your directory and begin tracking all your files for that project. This folder is mandatory and contains all the data git needs to run.
Afterwards, run:
git status
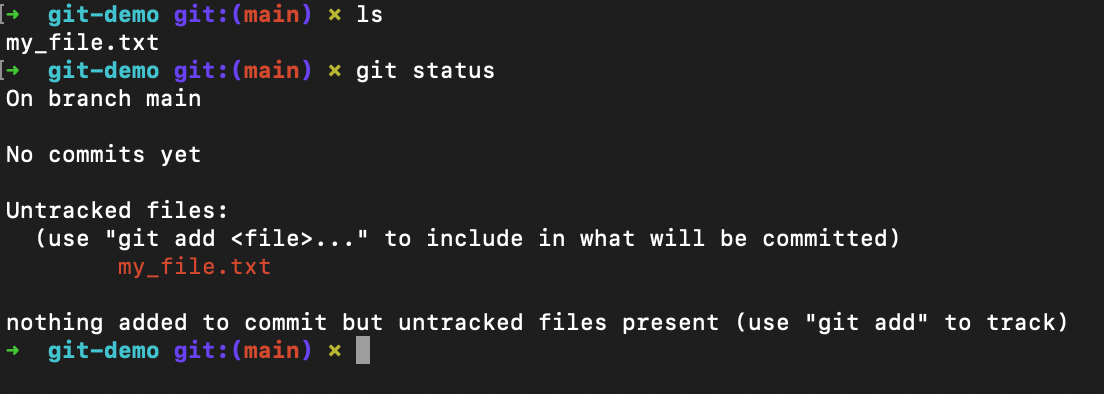
git status to see the staging status of files. my_file.txt is highlighted in red because it hasn't been staged yet.As you can see, this will display what branch you are on (main), as well as show which project files are untracked and tracked. It will also tell you if there are changes committed and ready to push. git status is your bread and butter for understanding what Git is doing when you run Git commands.
Note: You should get used to running this after every other git command until you know what you are doing. Because it will help you understand what happens after each command and give you redundancy for any mistakes.
So, if you have files in your project and ran the above command, you'll see all your files are currently untracked and highlighted in red.
There are multiple steps of redundancy in Git and ways your code becomes backed up. As we are currently working, we are on a local repository. Which has 3 states, unstaged, staged and committed changes. Which is why when you run git status and you have files, you'll see them in red because they are unstaged.
To stage them; meaning, put them in a place where you haven't committed, but you want to do something with, you can run
git add your_file_name_here
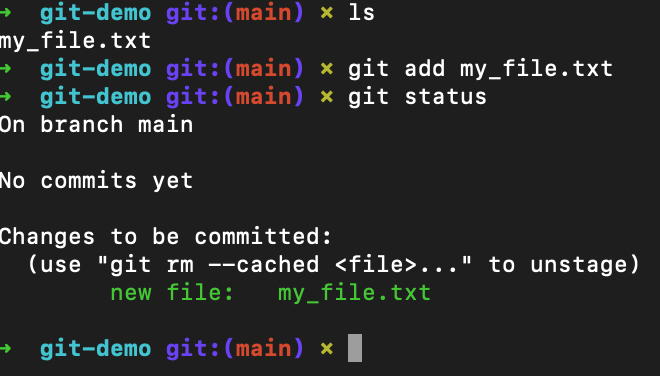
git add my_file.txt, which then shows as green after running git status to verify it was staged correctly.Then again, run git status and you'll see that the file is now green; meaning that it is now staged and ready to be committed. Trying to stage all your files one by one can be quite tedious, so instead run git add . which will stage all files in one go.
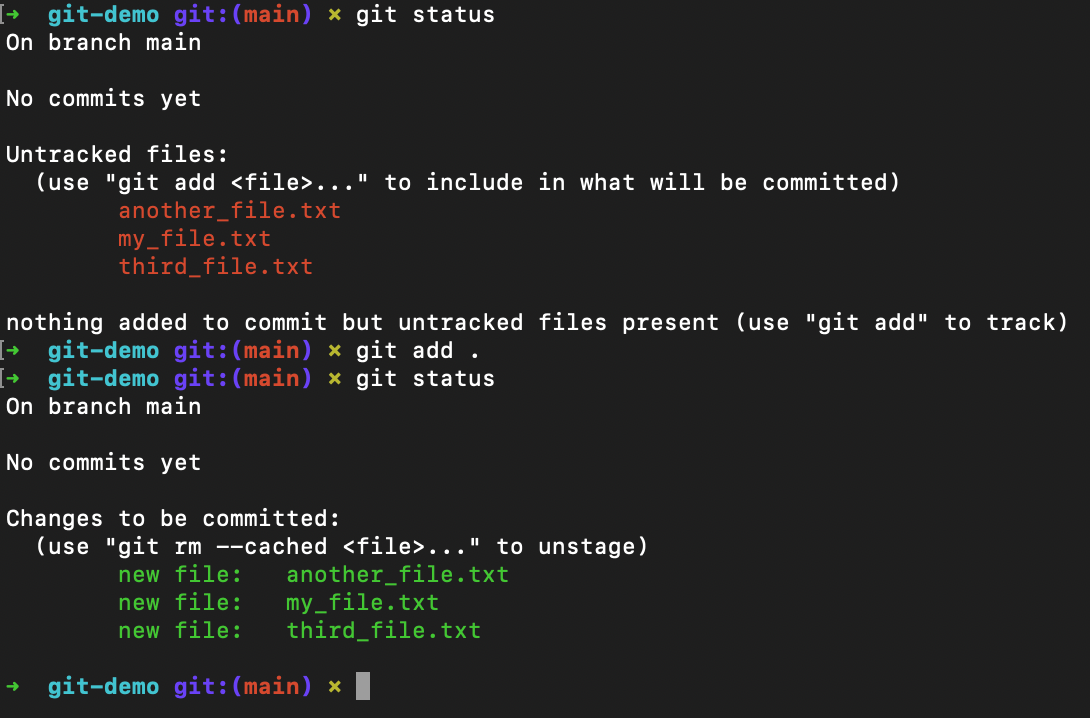
git add . and verifying this with git status afterward.So, if you've run git add . and your files are staged, you'll then be ready to make your first commit. Committing is like taking a snapshot of your project at a specific moment. This allows you to have a history of commits in your project and be able to return and see what you did. It's really useful for making changes to your code, experimenting and having commits that you can return to. Did you make a buggy feature that crashes your entire website? Git'll let you rollback to when it was working. No panicked downtime!
Commits must have a message, and the idea of the commit message is to be concise and describe what you are committing. So if you were to implement a small widget to pull Google API data, you could name your commit "Google API widget implementation". When you're working alone, the commit message isn't critical, however, when pairing Git with GitHub and collaborating with other developers, it's dire that you get your commit messages right and spend a little time to describe what you are committing. It will help whoever has to look through your code and review it. As well as come in clutch when something goes wrong and you need to find the exact commit that caused the issue.
To make your first commit, you can run
git commit -m "your commit message"
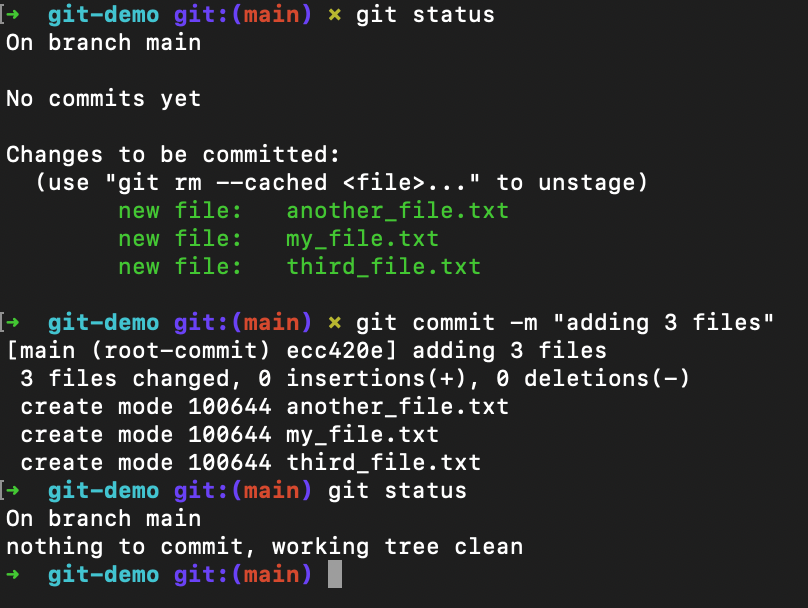
git commit -m "adding 3 files" and then running git status to see that staging is now clear again, ready for your next batch of files to commit.Note: You must have at least staged one file to make a commit.
After running the commit command, you'll now have committed your staged files! If you notice when you make a new file and add it to staging, you'll see they are red again. Which will now belong to the next batch of files to commit. Do this. Make another commit and then run this command.
git log
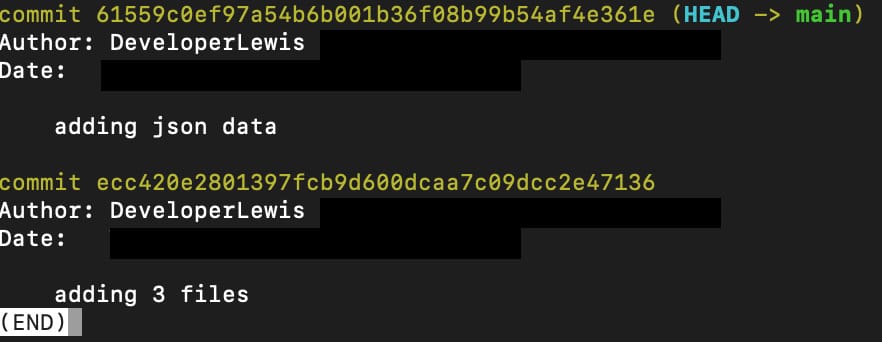
git log of 2 commits I made with their message and commit hash.This will show all your commits on the branch you are currently on. You'll see a commit hash and the message you gave it when committing. This is its version history. When we back it up on GitHub, you'll see it there too. If you're stuck in the log press q and it will exit the log viewer.
Using GitHub
That's it as far as local repositories go to save some code. This should serve as a good start for getting your code saved locally. But if you trip up over your spaghetti cable of a computer setup and it goes tumbling down the stairs, you'll lose all that code, even if you committed it! This is where GitHub comes in. Think of it as cloud storage but for code.
Go ahead and make an account on GitHub if you haven't already and make a new repository. Give it a name and then decide whether you want it to be a public or private repo. A public repo means anyone can download your code, reuse your code for their own projects, ask to contribute to the project (pull requests), etc... Making a repository public is essentially open sourcing your code. private repositories are only available to you and others that you choose to give access to.
These are the 2 main settings when making a new repository, but look around at the settings more and create the repository when you're ready.
You'll then be presented with some commands to follow. However, we've already done the first few commands, so I'll quickly rehash them again as well as explain the other commands that we haven't touched on yet.
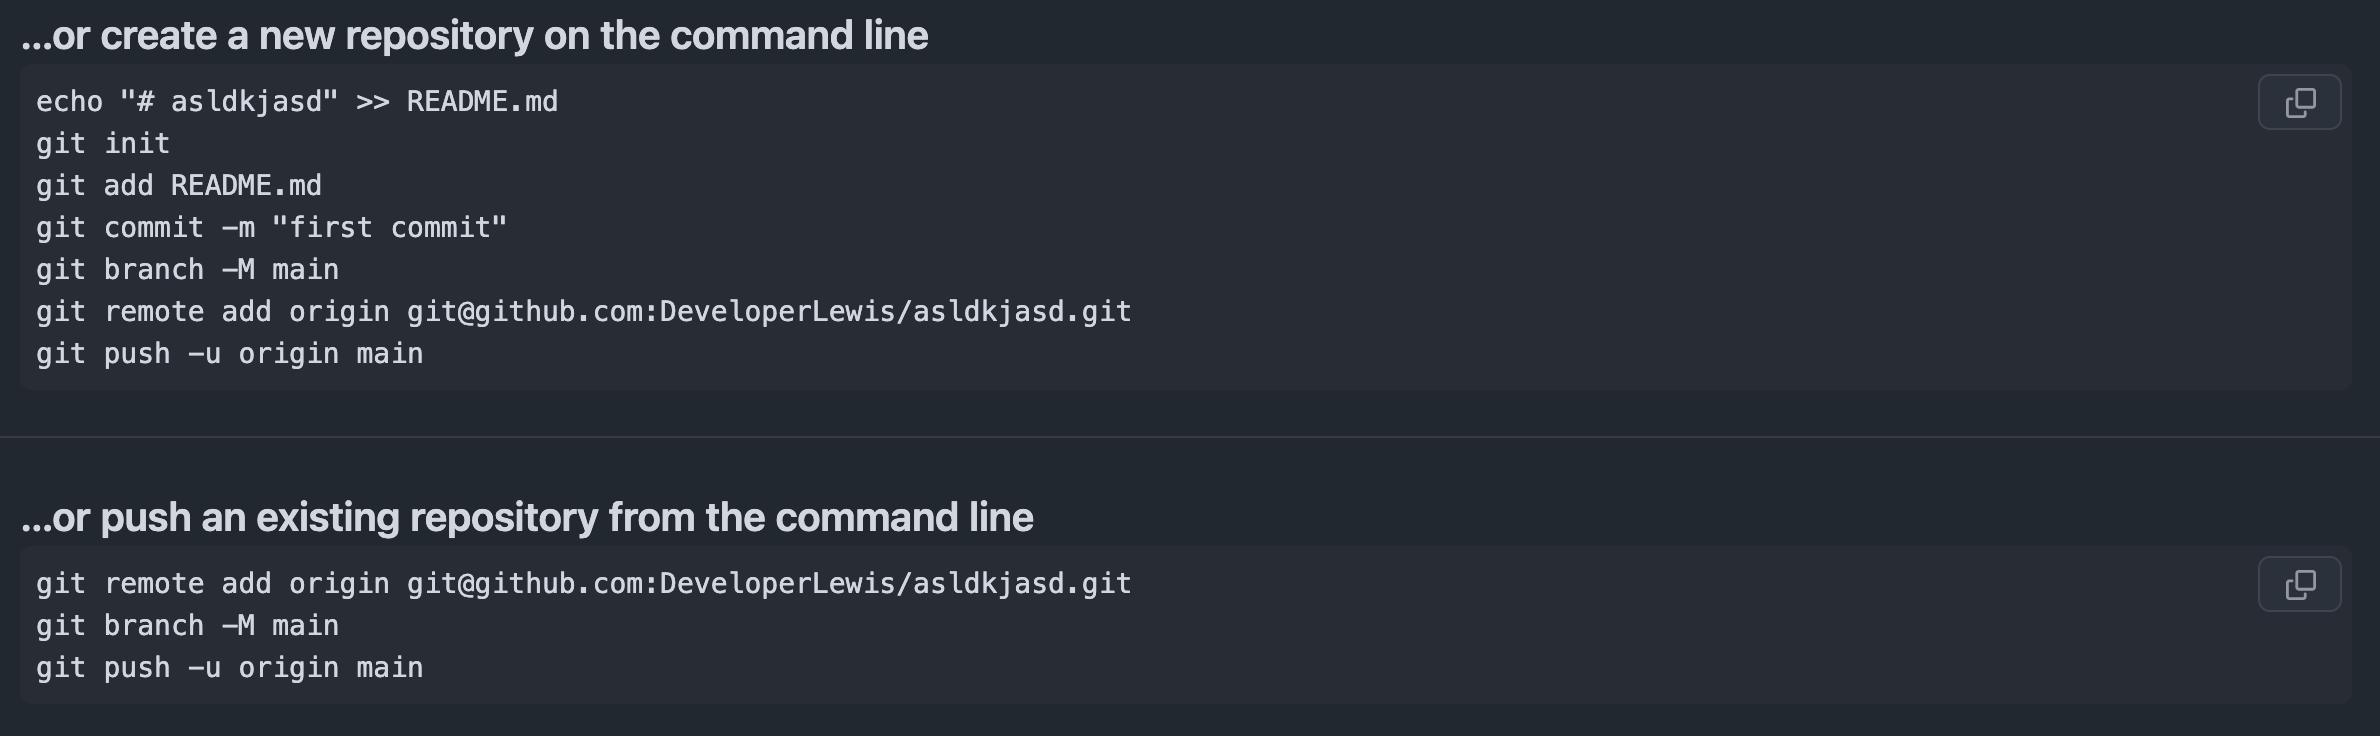
First command is creating a README.md file and popping some text in there. (This is so the repository has at least 1 file that can be committed, however, we've already done this).
The second command is initialising a repository, the third is staging the readme file that was created, then the fourth is committing that readme file. Just like we did with our files. So, you only need to follow the next 3 commands below.
The next command is a bit weird, one that requires some backstory. When you first create a repository with git, you get put on a default branch called "master". For me and my examples, I'm on the "main" branch, which may differ from yours. We've been working on this branch locally, which you could see on my terminal's path with (main). However, GitHub has decided to switch Git's default branch name from master to main. The command git branch -M main is run to switch the local master branch's name from master to main. Just to keep things in convention for GitHub. You can edit your Git installation to make the default branch name from master to main automatically. However, if you're on your own, it's your preference, really.
Now, the sixth command looks complicated, but all it's doing is telling git that you would like to attach a remote repository to your local repository for this git project. The remote repository being GitHub and the link they provided for you. This is where you'll push your committed changes in the next command.
Finally, the last command is pushing your code to the remote repository we just linked. But we need to sync our local branch with the remote branch. So for the first push, you need to tell your local branch (main) to sync with the remote branch (main). For subsequent push commands, you don't need to specify the origin again. You can just run git push after you've set a sync between the local/remote branch.
The second block of commands is just skipping the local steps of committing and getting you up to speed a bit quicker.
Outro
After running all those commands, you'll have committed some changes locally and now, pushed them to the remote repository. If your PC combusts into flames, you'll be able to clone the GitHub repository and continue working on it on a new machine. Which is what other people can do if they are allowed to work with you on your repository!
You've learned how to stage your code locally, commit it locally and push it to GitHub, unlocking the superpower of versioning code and basic collaboration. This will unlock the ability to rollback and get your way out of sticky situations.
Here's a simple list of commands you've learned, and you should get used to them, experiment and try things in a practice/dummy repository.
git init - Used once to generate the .git folder for tracking your code.
git status - Used to check the status of your local repository and the file status on whether they are staged or not. As well as checking your commits.
git add . - Adds all files that are not staged to staging.
git commit -m "my commit message" - Commits all staged changes into a commit that you can view. Whether locally or on GitHub!
git log - Views all commits and returns details about the commit message, author, date and commit hash.
git push - Moves your local commits to the remote repository on github.
Member discussion